|
I have been a teacher for 11 years now. I have my Master’s in Reading Education. Teaching literacy is a passion of mine. I get giddy going to Reading and Literacy workshops because I know I’ll leave with a new idea and strategy to take back to my classroom.
And since I became a mom, ideas for my son to do at home. In today’s blog, I will break down 5 literacy activities that I am doing right now in my classroom that you, as parents, can easily do in your own home. For each activity, I will list the materials needed and the age range for the activity. Spoiler alert: I teach deaf and hard-of-hearing students at the high school level. My students have a wide range of reading and language levels, but one thing that is all the same is that they ACTUALLY like these activities. I know, mouth wide open emoji. Teenagers actually liking something. #gross. But, they have asked me to do these activities each week. And that’s when you know you have a good literacy activity on your hand, folks. Lauren Barrett Writes is a participant in the Amazon Services LLC Associates Program, an affiliate advertising program. As an Amazon Associate, I earn from qualifying purchases. Read more about these links in my disclosure policy. So Without Further Ado….the 5 Literacy Activities
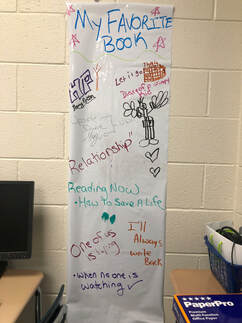
I saw this on Instagram from @thedimpledteacher and loved it. What is it? It is basically whiteboard sticky paper that you can place on the wall and use dry erase markers to scribble all over it. How am I using it? Kids love doodling and writing all over the board. I know I did when I was in school. Each month I have a topic or question displayed on the top, and students are invited to answer the question in the form of pictures, words, etc. They even can go up during free time to “graffiti” all over the paper. How to use it at home? Now, your little ones will be allowed to actually write all over the wall with this activity! Invite your kids to answer a question of the week or practice their ABCs or numbers. Or use the graffiti wall to do one of Busy Toddler’s activities or Days With Grey’s breakfast invitations. Or use it for kids to practice their spelling lists or hand writing. Or, or, or... Kids will like the novelty of “writing on the wall” and will be more willing to participate in whatever literacy activity you plan for them. Age Range? Any age!
2. Shades of Meaning
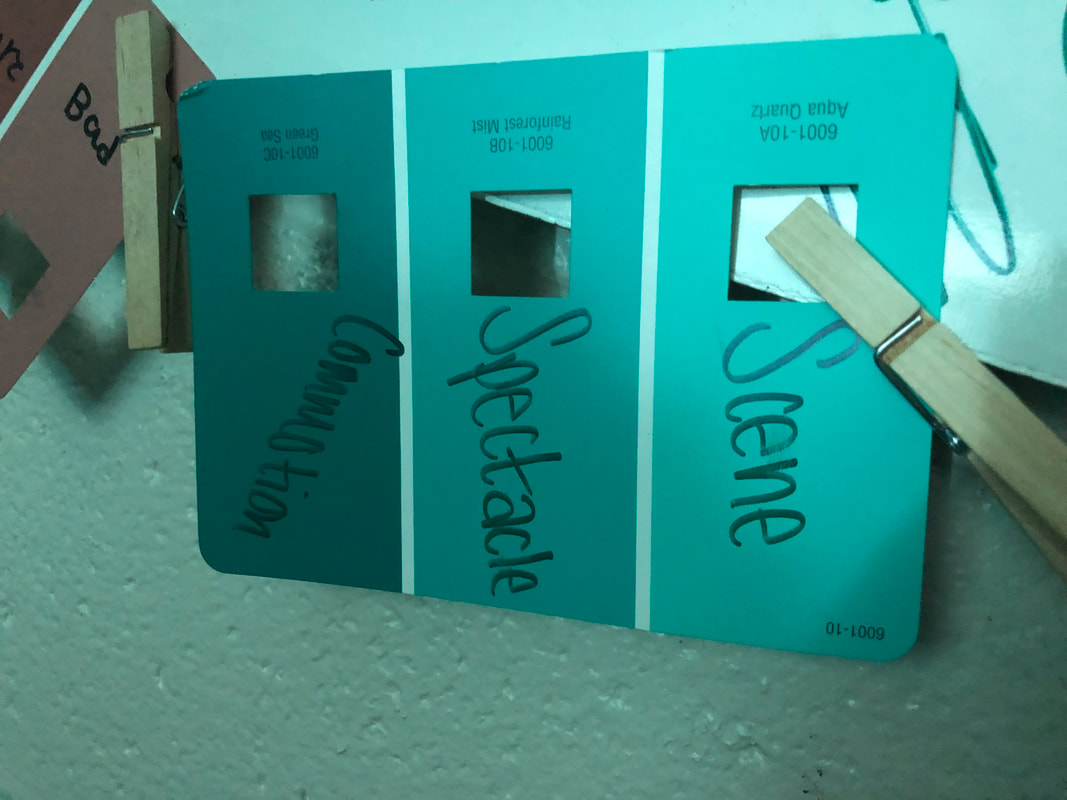
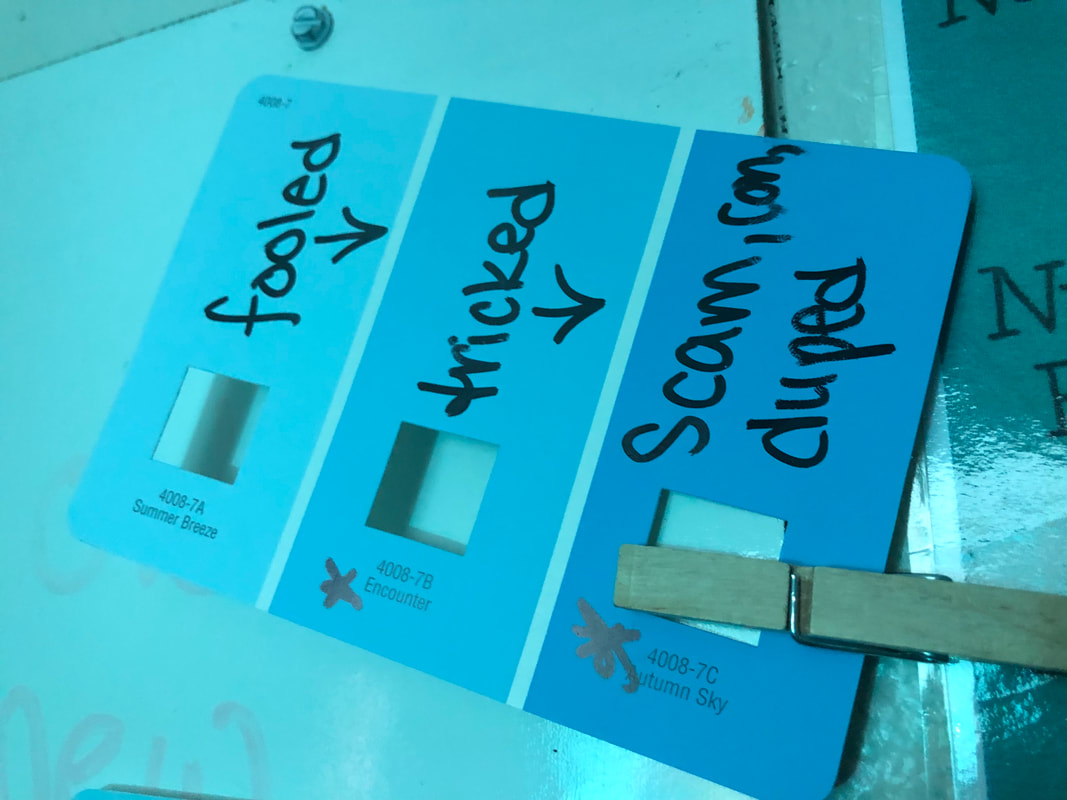
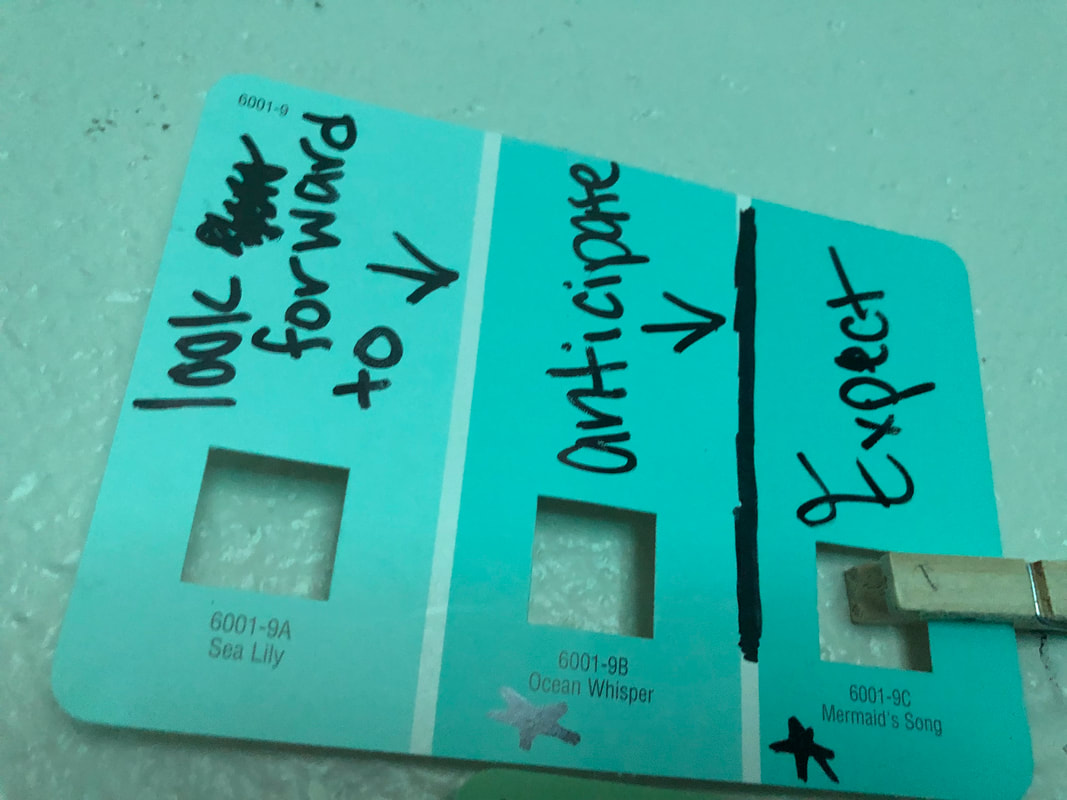
I first learned of this in a literacy workshop a few years ago. My students love this activity and hope your kids do as well. What is it? Find paint chip samples at any hardware store. I gather up a large variety of colors. Give your kids three words that mean roughly the same thing. How am I using it? They are going to reason through these three words and decide which has the strongest meaning and which has the weakest meaning. The word with the strongest meaning goes on the darkest shade, and the word with the weakest meaning goes on the lightest shade. For example, I will give my students the words ‘declare’, ‘say’, and ‘announce.’ My students will discuss in partners which one carries the strongest weight and makes more of an impact. Eventually, they determine that declare is the strongest word, announce goes in the meaning, and say is the weakest. I will ask for the train of thought and tell them that I agree with them. Finally, I will encourage them to use their strong words in writing and speech instead of always choosing weak words. How to use it at home? You can use it exactly as I use it or you can create your own spin to it. You can give your kids groups of three words, and they will have to rank which they like from least to best. Or smallest to largest. Or youngest to oldest. Or, or, or again. I would do this activity at the kitchen table or desk while you have to get something done but are still able to converse with them. Have your groups of three words and paint samples laid out on the table, explain the activity and model how to do one, and then go fix dinner or fold the laundry or heck even sit and sip coffee while they devour up this activity. Additionally, the paint chips make a cute decoration to your child’s room or playroom. I display mine around my classroom and it adds color and fun to the, otherwise, drab walls. Plus, they are a form of reference. Age Range? Kids should have the ability to read and copy down the words they see, so this could vary among kids. My suggestion is 6 and above.
3. Word Wall
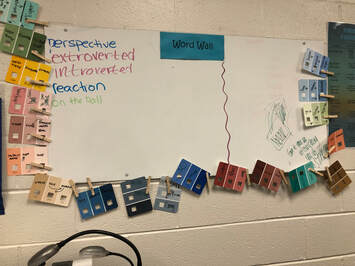
I have been using a word wall in my classroom for 8 years now, and they have made a difference in my students’ vocabulary development. What is it? A display of talked about, important words that your students should know and remember. How am I using it? Our weekly vocabulary words, affixes, and idioms are displayed on the word wall for the whole year. Also, any word that we talk about that my students don’t know and that I deem important goes up on the word wall. Now, students have a frame of reference for these words. They can always see them, so the words are on the forefront of their minds. I also color code them, so the nouns are all one color, adjectives a different one, and the verbs a third color. How to use it at home? Anytime you talk about an important word in your family, put it up on the word wall (you can use the same paper for the graffiti wall). For your younger kids, you can have them print out a picture to go with the word. I would search Pinterest for different ways to display your word wall. But mine is just simple. Make sure your word wall is somewhere where your kids can see frequently. Age Range? Any age.
4. PQRST
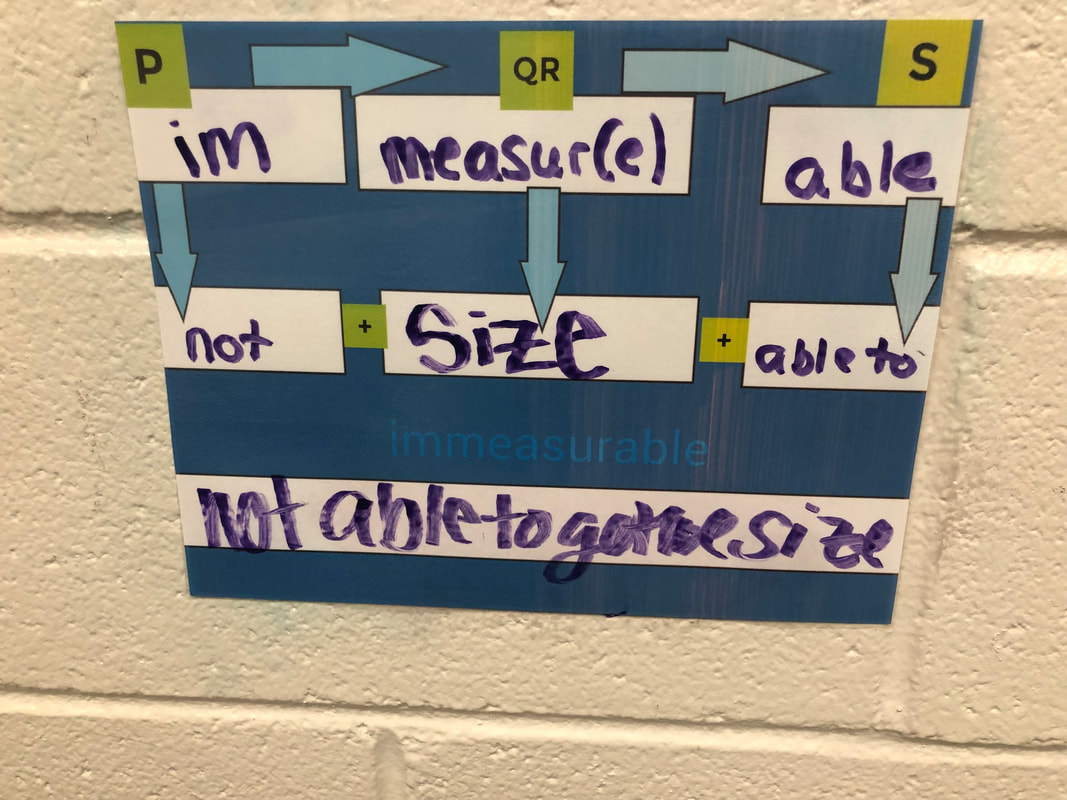
P = prefix. QR = queen root. S = suffix. T=total. I am a big fan of morphology and derivation. To get into the nitty gritty of morphological analysis, you can read my case study that I did on it in grad school here. What is it? PQRST is the process of teaching kids that words have smaller bits of meaning in them. And knowing the meaning of these morphemes helps determine the overall meaning of a word. How am I using it? First, I teach a weekly prefix, suffix, or root weekly, so students who have had me for 4 years get approximately 80 affixes directly taught to them. And, of course, they are exposed to more indirectly. Second, I teach them the PQRST strategy through direct instruction and modeling. I teach them that a lot of words can be broken down into a prefix (p), queen root (qr), and suffix (s). After identifying those morphemes, they are taught to find the meaning of each. Lastly, they are taught to add those smaller definitions together to form one total (T) definition that makes sense in context. Students love practicing with PQRST and my enthusiasm for the matter makes them love it more. How to use it at home? I would use your large graffiti wall to draw the diagram for PQRST (see picture below). Together, you can search for words to break down together. Or this can be a breakfast invitation or something you set up when you need to get ready. Or this can be a weekly homework activity. Or, or, or. Your kids will love this especially if they are able to use the big whiteboard paper. Age Range? 7-8 and above.
5. Reading Chart
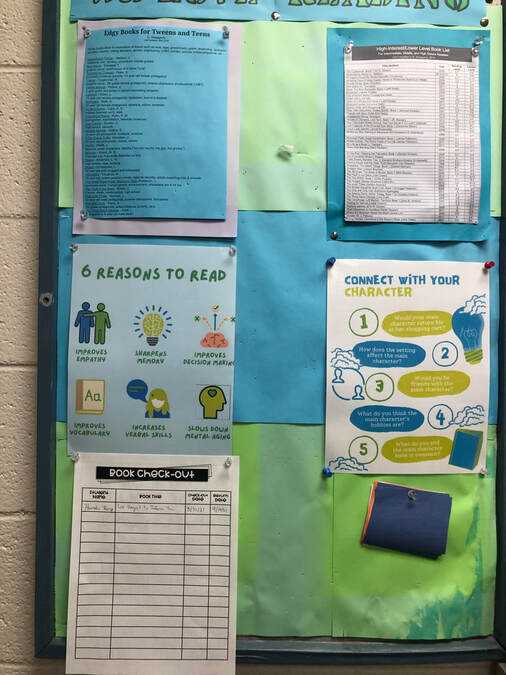
“Reading is to the mind as what exercise is to the body.” Get your kids reading. What is it? A reading chart is simple. It’s a list of books your students read. You can add extras to it if you like. How am I using it? Anytime my students read a book, they are to write it on a sheet of paper. Then, I have them answer some questions on a little piece of colored paper that I then display around the reading chart. The purpose is to highlight reading for pleasure with this no pressure activity. How to use it at home? I would use it the same way that I am doing. But maybe add some incentives. If your kids read so many books, they get something. I would also implement SSR (sustained silent reading) in your household. A time when your kids and you pick up a book and just read for 15-20 minutes. Set up a cozy reading corner and play soft music to set the mood. SSR is especially good for teenagers. Head to my website to see what I am reading or head to my teacher website to see the best books for teenagers. Age Range? You can do this at any age. But before your kids can read on their own, you will need to read the books to them and help them fill out the reading chart.
There you have it! 5 literacy activities you can try at home today. Just remember that literacy activities at home should be low pressure and fun. We don’t want our kids losing their love for reading.
Have fun!
0 Comments
We are at that age when my son has a lot of BIG feelings. And as a parent, my role is to be there to make sure he isn’t navigating these emotions alone.
Clinical psychologist and mom of three, Dr. Becky from Good Inside, says that oftentimes toddlers don’t find the actual feeling scary, but have a hard time when they think they are ALONE with the feeling. That’s when they might act out - hit, scream, throw, bite. It’s during those times when they are having trouble identifying and regulating those BIG feelings. So the best thing we can do as parents is to consistently talk about their feelings and give them names for what they are experiencing daily. Not only do we have to talk about their feelings, but we need to show them and help them practice identifying and regulating their emotions. To do this, you don’t need a fancy subscription to a Feelings Toolkit or the most expensive product advertised on social media. All you need are products found around your house or the local library to help you get started with teaching your toddlers about their feelings.
Lauren Barrett Writes is a participant in the Amazon Services LLC Associates Program, an affiliate advertising program. As an Amazon Associate, I earn from qualifying purchases. Read more about these links in my disclosure policy.
The 5 Best Products - Let’s Go
1. A Mirror
Mirror, Mirror on the wall who is the happiest of them all? It’s you! That’s right, a mirror is a great way to teach about feelings. Break out a small handheld mirror and get to work on making faces for each feeling with your little one. All those mirror selfies will come in handy for this one. Hold the mirror up to your toddler's face and say, “Show me your sad face.” Together, make your most exaggerated sad face. For added teaching moments, give a scenario followed by what face you would make if that situation actually happened. “Your ice cream cone dropped to the floor. Oh no! Show me your sad face.” “You got a new toy for your birthday. Yay! Show me your happy face.” This works wonders because your toddler not only sees you modeling situations and the faces you make, but he can see his own face too and recognize what his emotions look like. You’ll have a blast with this one.
2. Books
Books are one of the best ways to teach little kids about their feelings. You can either buy a book directly related to teaching emotions or read any book and point out the character’s feelings. Ask wh- questions as you read. No worries if your child is too young to answer back. Ask the question. Wait. And then answer for your toddler. Who is feeling sad? What happened to the boy? Why do you think he is so happy? _______ happened. How do you think that makes her feel? _______________ happened. What do you think will happen next? Some of the books I like related to feelings are…
3. Dolls/Stuffed Animals
Every kid probably has a handful of dolls and stuffed animals lying around. In fact, we got our son a little stuffed doll that looks like him that we named Lil’ Hen. Use these dolls or stuffed animals to act out situations. For example, Henry has been potty training, and he has been a little (and by a little I mean very) afraid of pooping on the toilet. I use his Lil’ Hen doll or favorite stuffed animal (Mr. Penguin) to act out trying to poop on the toilet. I talk about how they were scared beforehand but afterwards felt proud. Henry watches me act out these scenarios with fascination. If your toddler has been having an issue with hitting or biting, act it out with stuffed animals. Have one get angry and hit the other. Then, talk through how the animal that got hit would feel afterwards. I really like the stuffed animal WhatsItsFace because you can change the face of the animal to match the emotion. It has a happy, angry, sad, surprised, sleepy, and excited face. Act out each of these emotions and have your children find the face to match. As your kids grow, they can act out situations to match the face. Let your creativity loose with stuffed animals and dolls when it comes to emotions.
4. Markers and Construction Paper
Break out the markers and construction paper and draw different faces with different emotions. Point them out and have your toddler guess which feeling the face is conveying. You can even teach them that different colors convey emotions. For example, angrily scribble red lines everywhere and explain how red can mean anger. Or use green to represent envy or disgust. Then, let your little one take over with the markers and paper. You can give them prompts like: “How would you draw someone who is sad?” or let them have free reign. But whatever you do, do not correct them or tell them what to draw. There is no right or wrong here.
5. Music
Using music to teach emotions might be a little advanced for younger toddlers to truly grasp, but it is a great teaching method to help them understand the abstractness of feelings. Play different tempos of music and talk about what emotions they represent. For example, a head-banging, heavy metal tune could mean anger while the gentle flow of a babbling brook can mean peaceful, content, happy. Next, allow your children to make their own music with real instruments or makeshift ones. Banging loudly on pots of pans can be used to convey fury or anger. Just like with the markers, let your kids take over with this one.
Wrapping It Up
Whichever way you decide to use, remember that there is no wrong way to teach emotions as long as you are talking about them consistently and truthfully. Discovering their feelings is BIG for toddlers, and they don’t want to be left alone with them. Start by talking about them once a day or pick one of these methods to try each day. You don’t have to spend hours discussing feelings at length. Just 5-10 minutes here and there. You’ll discover a big difference once you all start talking about them more. A happier kid with more positive behaviors. For a video on how I am using sign language to teach emotions click here. And for the checklists I use when my toddlers have BIG emotions click here. For for information on my parenting book and guide click here.
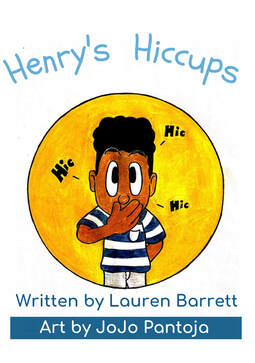
I have always wanted to write a children’s book. Probably since I was young. In fact, teachers and college professors told me that I should write a children’s book. But an idea for a story never came to mind until I had a child of my own. When Henry was born, he had a lot of hiccups. And out of that Henry’s Hiccups was born. Robert Munsch was and still is one of my favorite children’s authors. I love the silliness and repetition of his books. The design of this book was inspired by him. What is the story about? Henry is a happy student until he encounters a problem. He can’t get rid of his hiccups. He tries a number of ways to get rid of them, but no matter what he does his hiccups keep getting in the way of correctly answering the teacher’s questions. That is until he discovers a new way of answering questions without speaking – sign language. Why is this story important to me? 1. I reached a lifetime goal. Writing and publishing this story helped check out a lifetime goal of mine. It certainly wasn’t easy. I queried and sent in my manuscript to upward of 30 publishers. I heard back from TWO of them, and they were both no’s with very little feedback besides “Thank you for sharing your story with us. Unfortunately, it isn’t a right fit for us.” That was hard, but the silence was harder. I kept imagining that my manuscript was sitting in a huge pile of unread stories. I soon learned that I was right, and this unread pile was called a slush pile. I learned this in a Publishing a Children’s Book class. After the class, I realized that self-publishing was the way to go. It wasn’t admitting defeat. It’s actually becoming more and more popular with so many sites helping you with self-publishing, and more and more authors wanting to have full ownership and say in their stories. After a few more failed attempts at getting my story published with a traditional publisher, I started my self-publishing journey. And that’s why I am so proud of my book. It’s all done by me or someone I know. 2. My illustrator is a former, deaf student of mine. Which brings me to my next reason why this book is so important to me. I teetered with the idea of hiring an illustrator, but since the book features a deaf character, I really wanted a deaf illustrator. JoJo, a former student of mine, was just the person to ask. They was one of the first students I had in class as a teacher. Their artwork was brilliant back then, and I always thought they had amazing talent. We had kept in touch over the years, and I had approached they once about illustrating my book, but they was hesitant to do so because they didn’t have any credentials or professional experience. I didn’t care about that. I knew they was talented, so I kept pestering they to do it. JoJo finally agreed. And I was so excited. JoJo illustrated and brought Henry’s Hiccups to life better than I could have ever imagined. It makes me so proud to have one of my former, deaf students illustrating this book. 3. My book is diverse and represents my family. Another reason and the most important reason Henry’s Hiccups is so important to me is because it’s about my son. As a biracial boy who has one black parent and one white parent, I don’t see a lot of representation of biracial families in children’s books (although this past year it has gotten better). This book normalizes having a biracial family without the focus being on that. The family just exists in the background of the story. I want readers to have the takeaway, “Ohh, there’s a biracial family. Cool. Move on.” The same is true for the deaf character in my story, Natalie (named after JoJo’s best friend in high school in real life and also a former, deaf student of mine). The focus isn’t on Natalie’s deafness. She is a character that exists in everyday life, and it shows how deaf and hearing people can be friends. Oftentimes, deaf people have to adapt to a hearing world, and they have to accommodate the hearing people who come into their world. But, in the story, Henry knows sign language. He adapted to Natalie’s world because his friendship with her is important. None of that was said, but that’s how I imagined it when I drew up the idea for having a deaf character be friends with Henry. Maybe an idea for a second book - the background to Natalie and Henry’s friendship. When writing the book, I loved the idea of sharing my love of sign language with the world and knew it made a great secondary piece to the story. I share 10 basic signs to learn in the back of the book. They are also illustrated by a former, talented, deaf student of mine, Dunia Etulu. All of these reasons together make me super excited to share this book with you. How to use this book as a teaching tool? As a teacher, I knew I wanted to write a book that could be used as a teaching tool with young kids. Here are the ways you can use my book to do that… 1. Repetition and making predictions The book follows a pattern. The language in the book is repetitive which is good for young readers. It helps them make predictions of what will happen next. Henry is told three, common ways he can get rid of hiccups, but each time he thinks the hiccups are gone, he hiccups while trying to answer the teacher’s questions, and everyone laughs. After the first attempt fails, invite your little ones to make predictions on whether Henry will get rid of his hiccups. Also ask them what they think Henry’s idea is when he sees Natalie’s classroom toward the end of the book. 2. Synonyms The book uses synonyms for the word “laugh” each time Henry gets the answer wrong. Discuss how these words all mean the same thing and how your kids could tell they did. 3. Basic academics The book reviews three basic academic questions: The shape of an octagon, simple addition, and the first color of the rainbow. Besides asking your kids these questions only, review other shapes, addition problems, and colors. 4. Perseverance/Problem-Solving Henry has a problem, but he doesn’t give up. He keeps trying new ways to succeed until he finally does. Teach your children about a growth mindset. 5. Sign Language Finally, teach your kids sign language. Besides being fun to learn, there are many benefits. Read about them here and here. I hope you enjoy Henry’s Hiccups as much as I have with creating it. It’s a fun, silly story with so much more packed into it.
|
Categories
All
|
Proudly powered by Weebly







 RSS Feed