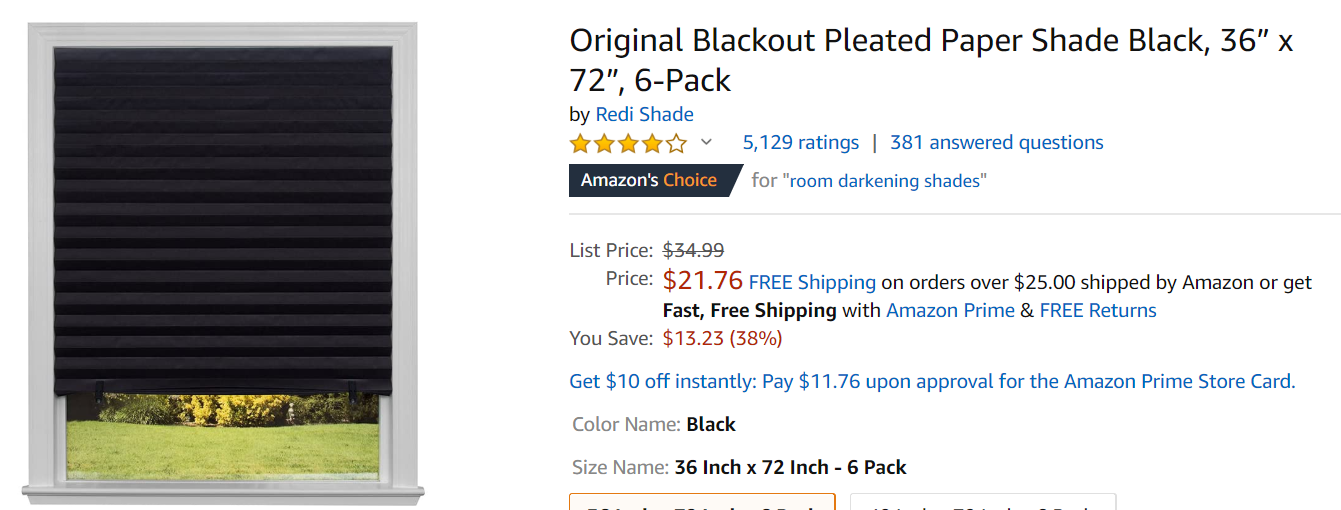
|
Some of the links in this post are affiliate links. This means if you click on the link and purchase the item, I will receive an affiliate commission at no extra cost to you. All opinions remain my own.
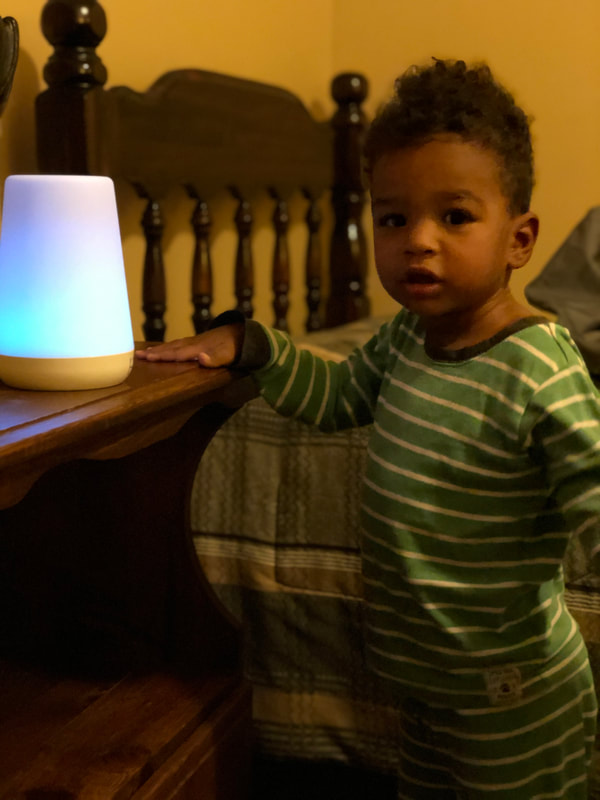
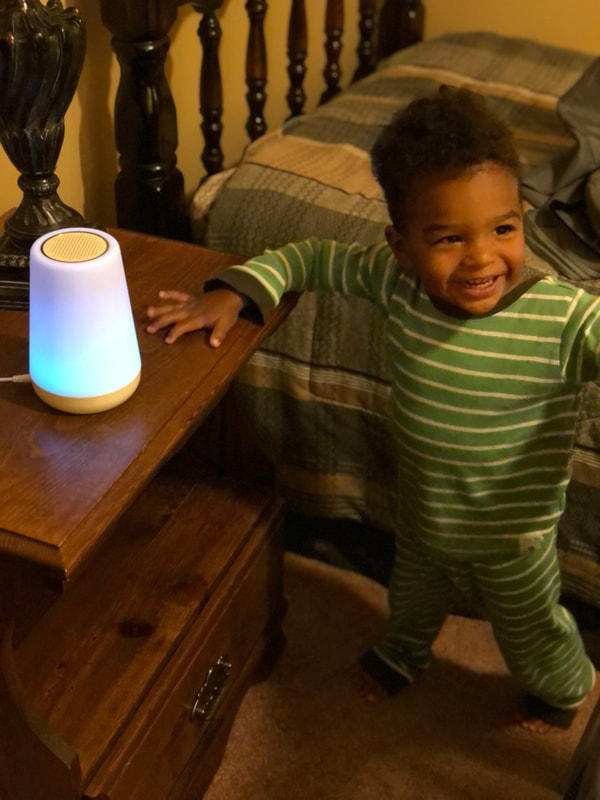
What is the Hatch?
The Hatch is a sound machine controlled through your smart phone. It has eleven different sounds to choose from and ten different colors to chose from. Parents can program when sounds can come on and turn off. The product guarantees better sleep with its soft light and white noise. It also grows with your child.
Should I Get One?
I originally opted for a cheaper sound machine, but my mom recommended the Hatch to me after someone recommended it to her. I'm so glad that I made the switch. The Hatch has been amazing. According to Harvey Karp's 5's, babies need loud shushing in the first 3 months and even beyond to replicate the sounds of the womb. Inside the uterus is loud. There is noise 24/7. Then, one day, your cute little baby is plucked from its comfortable, cozy home and expected to sleep in utter silence in the picture-perfect, gigantic nursery you created . No way! Imagine how terrifying. Get a sound machine and turn it on for bedtime and naps. When nighttime feedings were decreasing and we were aiming for that all-night stretch, we would feel dismayed when our son would start to wake and whine. Then, we learned to try pausing first, followed by turning up the sound machine without even leaving our bed (phone-controlled sound machine for the win). Worked. Like. A. Charm. Our son was back to sleep in no time, and we could breathe a sigh of relief. The Hatch also plays an important role with bedtime and daytime routine. We have a getting ready for bed sound (water) and color (pink) and a naptime sound (lullaby) and color (pink) and then a bedtime and naptime sound (wind) and color (orange). Our son has been conditioned when he hears those sounds that he knows it's time to get ready for nap or bed and soon go to sleep. We are still using our Hatch at 21 months and plan to even use it longer. When our son gets older, we will use our Hatch for quiet time. The controlled lights will let him know when quiet time is finished (perhaps a green light) and when he has to stay quietly in his room (perhaps a green light). The lights will also tell him when it is time to get up and get Mommy and Daddy. The Hatch is easily one of my favorite products as a mom. I give it 10/10 stars.
Buy a portable sound machine for traveling.
0 Comments
Some of the links in this post are affiliate links. This means if you click on the link and purchase the item, I will receive an affiliate commission at no extra cost to you. All opinions remain my own.
What is the Snoo?
The Snoo is a smart sleeper bassinet designed by Harvey Karp's Happiest Baby company. It combines three of the 5 S's - safe swaddling, gentle swinging, and a white noise shushing sound - to replicate the calming sensations of the womb. It guarantees a good night's sleep for you and your baby. I first read about the Snoo in Harvey Karp's book, "Happiest Baby on the Block," and instantly was intrigued and in awe of such a product. However, to shop and buy a Snoo it will run you $1, 395. To rent it costs $129 a month. Is there a price on sleep?
Should I Get One?
I hemmed and hawed over whether I should get one, but I decided to wait to see how my son slept with the 5 S's on their own. The Snoo was too costly for me to justify splurging on a sleeping device if my son already slept well. My son ended up sleeping well with the 5 S's and advice from sleep expert Cara Dumaplin of TakingCaraBabies. Although in a moment of weakness, I almost purchased the rent option in the middle of the night after two sleepless nights with my son. He ended up sleeping well the next night and pretty much from there on out.
What Other People Say?
I ended up having a friend find one for half price on Facebook Market Place, and she purchased it for her baby. She loves it and says it definitely provides her family with the extra sleep they need. Her son LOVES the gentle rocking motion! The swaddles have holes for the arms if your baby doesn't want his arms pinned down in the swaddle, and the swaddles keep the babies on their backs, for a good night of safe sleeping. She definitely recommends this product to all parents. The science behind it is proven, and when a baby and the parents get sleep, everyone is happier. She gives it 8/10 stars.
I have been a teacher for the deaf and hard-of-hearing for 9 years now. A common question I got was if I would teach my child sign language. I always replied with a hearty, “Of course.” I wanted to pass my love for the visual language down to my offspring.
Nevertheless, I didn’t want to just teach my kids sign language because I happened to make a career out of it. There are many benefits to teaching children to sign from a young age. Hopefully, after reading these reasons, you’ll want to reap the same rewards from American Sign Language (ASL) as well. 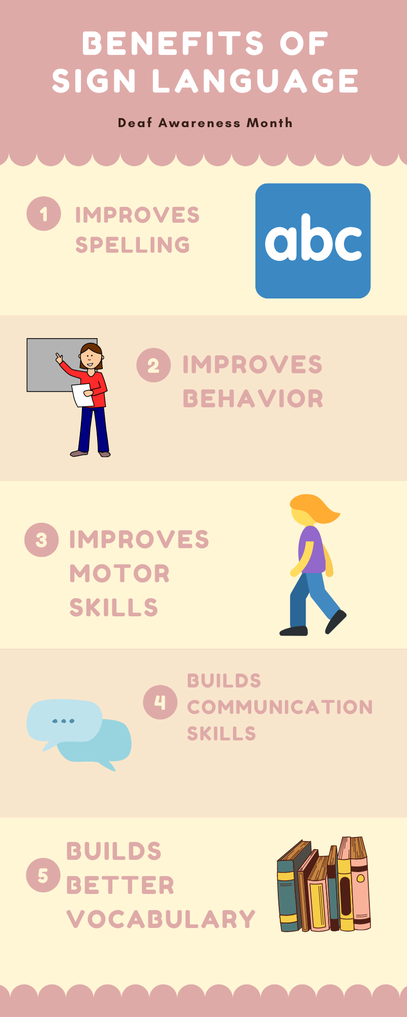
1. Sign language is another way to make connections
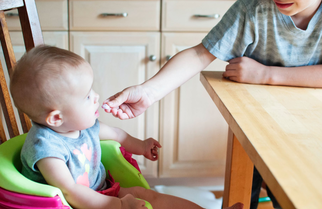
Babies and toddlers are growing up in a very stimulating world. They have a lot coming at them every day. Bright lights. Loud sounds. Fast-paced action. Sign language is another way for them to make connections to language. When my son and I read a book, I point to a picture, say the word, and sign it. When I talk, I sign key words (MORE, PLEASE, MILK, WATER, etc). When we spell out words with his little magnet letters, I say and sign the word as well. When we are out and about and see everyday things, I point, say, and sign what it is. In all, he’s getting the spoken, written, picture or real-life representation, and ASL version of a word. Sometimes all at once. Sometimes not, but either way it’s one more way for a young child to begin forming word recognition and connections. Low-hanging fruit. 2. Sign language helps with communication Research has shown that too much screen time can cause speech delays in children, but sometimes screen time can be unavoidable in a technology driven world. Sign Language can help. Studies have found that sign language taught at an early age can help progress speech development faster. In addition, sign language aids in easing frustrations. Oftentimes, toddlers don’t have the words to produce what they want, but they are able to sign what they want. Does it eliminate all whining and tantrums? No, but sign language prevents unnecessary prolonged crying. For example, instead of whining and leaving my guessing what he wants, my son can sign when he wants to drink milk, eat food, go to sleep, get more to eat, and be all done eating. He brings me a toy he wants opened or turned on by signing please. On the other hand, we can sign when something is “hot, no touch,” and he can repeat back by saying, “hot” and backing away. He also can find his toy animals when we sign what they are. We can see that he is reasoning in his mind that he understands what we just signed, and he is trying to put the pieces again. Then, the lightbulb goes off, and he finds the object. Overall, ASL combined with speech touches upon visual, auditory, and kinesthetic processing and helps store more pathways in the brain; therefore, memory becomes stronger. Again, another easy way to help in your children’s development. 3. Sign language can be discreet. All parents have had those moments where we are out in public and our child is causing a disturbance. We hiss under our breaths, “Stop it,” but our child can’t hear us. We want more than anything for the earth to swallow us whole. However, with sign language, I can sign STOP, NO, WAIT, HOLD without raising my voice and attracting all kinds of unwanted attention. It doesn’t work every time, but it is setting my son up for success in that I am teaching my son another way to control his behavior. On other occasions, I can sign something to my son without causing a break in the conversation. At dinner, and I notice my son needs to take a drink? I sign WATER. My son wants me to do something? I can casually rub my upper chest for PLEASE to let him know that he needs to say that first. Hopefully, in the future he can let me know when he has to go to the bathroom without shouting, “Poo poo or pee pee,” in a setting like church (although that would be funny). However, sign language lets you have those conversations you don’t want the world knowing. 4. Sign language is fun. Lastly, sign language is just fun. Little kids love hand movements and gestures, and sign language is exactly that. With it, parents and children can sign songs, nursery rhymes, and books. ASL is another fun element added on top of learning experiences. YouTube has tons of videos parents can search and what better way to spend some time with the kids. Sign language is another resource to have in a parent’s toolkit. I can see the light in my son’s eyes when he makes a connection. I can see his frustrations melt away when I quickly recognize what he is trying to communicate. I can see my shoulders visibly relax when I avoid a public meltdown with just one sign. I see the joy he gets when I make silly faces and songs. I can see him learning and growing. And that’s why I am teaching him sign language. Resources for Parents Elise Tate, Mommy Influencer, creator of SignMeUp, and wife of NFL player Golden Tate, has a great starter sign resource for all parents, teachers, and caregivers wishing to teach their children or students sign language. Her love of sign language started out as a necessity and soon turned into a passion project. After hearing the statistics that 90% of deaf children are born to parents who can hear, but up to 88% of those parents will never learn how to sign, Elise knew that she had to get her book and resources into homes and classrooms. SignMeUp is a book/resources designed for parents to teach their children sign language. She has plans to publish a whole series of sign language books and posters as well. Her dream is to expand the books to be in all schools, doctor offices, and hospitals. So why SignMeUp? 1. SignMeUp is easy to use. 2. SignMeUp is great for non-signers. 3. SignMeUp is a great resource. 4. SignMeUp is aesthetically pleasing and durable. 5. SignMeUp is diverse.
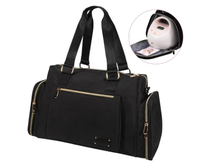
I’ll be honest. I thoroughly enjoyed breastfeeding, but I never expected to one day be sitting on the grimy floor of a supermarket bathroom squirting milk out of my overly full breasts. That would have been a hard pass for me in the Places To Pump Department, and I had already found myself pumping on the sweaty seats of a high school bus at a cross country meet as the bus driver blocked teenagers from climbing aboard. But if you are like me, you’ve had to or will be away from your breastfed child because of travel for work or pleasure. And also like me, the idea of pumping and traveling might be daunting to you, but I have lived and survived pumping on the go, even when I was pumping on the floor of a bathroom, and I am here to tell you what you need to know. 1. Know Before You Go Even before the plane takes off, there is a lot of work to be done to ensure that things go smoothly once you arrive at your destination. First, make sure that whoever is watching your child has enough of a milk supply to feed your baby. If your little one is like my son and you have a diva on your hands, then you know your bougie baby spits out anything other than breastmilk. My son did this until he was about 9 months. This means that you have to have a well-stocked freezer with a supply of breastfeed, which means that you have to do double duty for a few weeks leading up to it if you don’t already have an ample amount. You should have 25-30 ounces per day for your baby. Probably more. Of course, you can always ship your milk back home, but when I looked into it, I found it was way too expensive for me. In addition, you can have the childcare provider mix breastmilk with a little bit of formula to make the supply last longer. Or finally, you can buy breast milk from someone, which is what I had to do for one trip because I just couldn’t find the extra time to pump on top of my normal pumping and breastfeeding. I found a trusted person and bought her breast milk. It worked, and I wasn’t so stressed! Second, pack your supplies. You want to make sure you have everything you need before you jet out of town. What you should take with you is the following:
My encounters with the employees have been all pleasant. Most people want to be accommodating and helpful. Also, call or check your airlines rules and regulations regarding traveling with breastmilk. Again, my experiences were easy and non-stressful. I simply informed the TSA agent that I had breastmilk. They took it aside and looked in it without tampering with it too much, and I was good to go. Some restaurants inside the airport were also willing to give me extra ice to keep my cooler staying well, cool. Finally, see if the places you are going to have a place for you to pump. Airports and baseball stadiums all have lactation rooms from my experiences. Look on their websites to see where they are ahead of time in order to plan accordingly. If there are no places to pump, find out if there is at least a quiet, secluded room for you to utilize. I know all the prepping can be overwhelming, but when done, it makes the trip a lot less stressful when you are prepared. 2. Manage Expectations Whether you are traveling alone or in a group, you need to let yourself know and everyone with you what the expectations are. Be clear and firm that you have to pump when you have to pump. When traveling in San Francisco, I had to excuse myself from a wedding to pump and also while we were in the middle of sightseeing. On another occasion, we had to delay going to dinner because I had to pump. You do not have to feel guilty about this. You do not have to feel rushed. You do not have to apologize. If you are upfront about your need to excuse yourself to pump with all parties involved in your travel, then that is the best you can do, and if someone gets annoyed or irritated, that is on them, not you, because you laid out your expectations. Also, go easy on yourself. Pumping isn’t going to be like it is when you are following your normal routine. You might go a little longer between pumping sessions because you got caught up in the travel. You might have to pump more since you don’t have a child hungrily draining your whole milk supply. You might have to pump in strange places. You might even have to, God forbid - don’t say it, gasp, throw away some milk because you underestimated how much storage containers you needed. Take a deep breath. It’s okay. Give yourself grace. 3. Have a sense of humor Things will go wrong. Sometimes disastrously wrong. Like you might find yourself and your engorged breasts squatting over a toilet in a stall at Starbucks with a line out the door furiously trying to squeeze milk out of your tendered breasts. It happens. All you can do is laugh and learn for next time. Pumping while traveling wasn’t easy, but it’s not impossible. Know before you go, manage expectations, and have a sense of humor even if you find yourself on the dirty floor of a supermarket. You got this, Mama! 
Being a cool mom on my trip to SF!
I am a working mom. I teach. I coach. I write. I read. My “me” time is sacred. It’s my opportunity to get things done without a child hanging on to me, which I love by the way, but just not for the full day.
When my child naps for a long time, the angels sing a chorus of Hallelujah, and I head right to my desk to dive into a blog or straight to the couch to dig into a book. Or maybe I sleep. Or watch Netflix. Or clean. Whatever. I just want the opportunity to have those options. But before I dive into what I did to blockade car sleep let's look at why I did the insane things I did. When my son was around 4-5 months old, and we were really perfecting those nap schedules, I really valued putting him to sleep in his crib or pack n play. Why? Because his long naps allowed him to get the restorative sleep that he needed and me to have some “me time.” Moms, we know how important “me time” is. It’s like gold, and I wasn’t going to let a car nap take away my coveted time to myself. So what happens when your baby falls asleep in the car on your fifteen minute drive home? That catnap, even if it is only 5 minutes long, kills the sleep drive. That car nap sends signals to the brain: Hey, I am not sleepy anymore. That nap satisfied me. Let’s play! Try to put your child to bed after a catnap, and he won’t have it. He’s ready to go! Then, you’re left trying to chase naps all day. It’s exhausting. Unless you want to drive around for an hour and half, so your baby can get his full nap, follow these ways to prevent the dreaded car naps. 1. Tag Team It If possible, enlist the help of a spouse, friend, other child, or family member to come with you if you must go somewhere that might overlap with a nap. On your way back when it’s getting close to nap time, one person will ride Uber style in the back and the other person will be the chauffeur. The person in the back has the job of keeping the baby awake by tickling the baby, making loud sounds, or even lightly squirting water on the child. The person driving has the responsibility to drive safely but not like a slow poke. Once home, one person takes the baby straight away to the nursery to start the nap routine while the other one is left unloading the car. Then, enjoy your alone time. You deserve it! 2. Rattle Car Keys My last car had a keyless start, so I would rattle my keys incessantly anytime I saw my son start to drift off. One hand was safely on the wheel and the other shook those keys like my life depended on it. Henry’s head would snap right back up every time. Did I feel cruel? A little. But not enough to warrant me to stop. After all, I was doing this for him, so he could have a nice long nap that left him well-rested and happy. My rapacious rattling had nothing to do with my desire to lie down and read a book. When I got a new car and had to put my keys in the ignition, I banged my keychain against the dashboard as best I could. Not as effective, but it still worked. I highly suggest purchasing one of those jingle bells and keeping it on hand in the car. Want to take it up a notch? Belt Jingle Bells at the top of your lungs until you get home, and then you can sing Silent Night as you creep out of the nursery to enjoy some peace and quiet for a couple hours. 3. Talk in Whale Yes, I am talking about Whale as in the whale speech in Finding Nemo. Before discovering Whale, I would narrate everything that was happening out loud to keep Henry awake. Yet, adding in the dialect of an orca spices things up and piques Henry’s curiosity, so he’s more apt to hang on to witness Mommy’s newfound craziness. To really get into the role, move your body back and forth like you actually believe you are a whale. Mommy is making a right turn [bob body the right]. The car stops at the red light. Now it turns green and here we go. Vroom Vroom [Contort your body as if you are emerging out of the water to blow water out of your blowhole]. Now we are home, home, home. Time to sleep. You’re whale-come. 4. Activate Scream Mode This one is very similar to talking in whale, but instead of narrating everything in Fish, you will recount all details of what you’re doing by screaming. To extend this practice, you can see how loud you can scream your child’s name. For example, my son’s head would slowly drop. “HENNNNNNRRRYYYYYYY!” He would snap back up. A short time later, his eyes would grow heavy and start to close. “HENNNNNNRRRRY!” Even louder that time. This headache inducing practice continues until you arrive home, and your child goes down for a nice, long nap, and Mama can kiss that headache goodbye as she kicks her feet up on the couch. 5. Roll Down the Windows I have a saying, “When Henry’s eyes are no longer brown. It’s time to roll the windows down.” Super cheesy but effective. As soon as those eyelids become heavy, I roll that window all the way down and let the air and noises flood into the car. Henry’s aroused from his short-lived slumber. This strategy works even better when it’s raining, and those droplets can pelt Henry on the face. Then we arrive home and it’s to the windoooowwws to the beds. The sweat stops running down my head. All the mamas can now call their friends. I hope these tips help!
Some of the links in this post are affiliate links. This means if you click on the link and purchase the item, I will receive an affiliate commission at no extra cost to you. All opinions remain my own.
Nested Bean products are scientifically proven to calm a baby. Their products mimic a parent's touch when their weighted pads are activated. These bean bags on each side makes it feel as if your children is being held. They guarantee that your baby will sleep better in 1-3 nights. 
Nested Bean's Zen sleepwear comes in five different products:

Mothers who have used this product have attested that the products are very calming to their babies. Once wrapped in the swaddle, the babies would immediately settle.
The best aspect was how it calmed her [our daughter] when she was upset and would easily put her to sleep with it on.
Not only do the parents love the products, but daycares do as well. Moms and Dads reported to buying two of them. One for daycare and one for the house. One mom said that daycare describes Nested Bean as a "miracle worker" for when babies get fussy.

Our daughter literally slept through the night with the Zen Swaddle from about 3 weeks on. Napped very well in it too. We would only do one feeding a night if she woke up. 
Nest Bean products are safe, durable, affordable and machine washable. They are definitely something you want to add to your baby registry today. You will be getting the rest and sleep you deserve in no time and then you will be able to wake up to a happier, healthier, and well-rested baby too! Order yours today!
How We Transitioned from Room to Nursery
Some of the links in this post are affiliate links. This means if you click on the link and purchase the item, I will receive an affiliate commission at no extra cost to you. All opinions remain my own.
Step 1: Follow @takingcarababies on Instagram or check out her blog.
Cara is amazing! She is a sleep expert and a former nurse. Her tips have helped tremendously.

Step 2: From Birth-4 months we kept our son in our room in a bassinet next to my side of the bed.
This was easy for me to grab him whenever I had to breastfeed.
Step 3: Around 4 months, we got rid of the bassinet and switched to the pack n play portion.
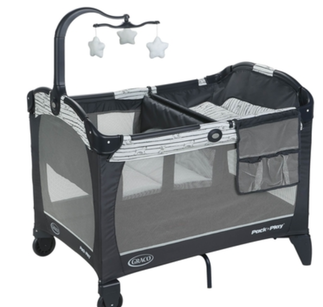
This is what we used.
Step 4: Around this same time, we moved our son further from away from me but still on the same side as me.

Step 5: Around 5 months, we moved the pack n play to the opposite side of the room, the farthest away from me.

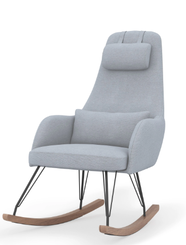
Step 6: Around 5 months, we also moved the glider to the nursery. Most of the feedings and bedtime routine now took place in the nursery rather than our room.
Step 7: Around 6 months, we tried to do as many naps as possible in the crib in the nursery instead of our room. Make sure it's dark!
Recommended by Cara
Step 8: Around 8 months, we transitioned to the nursery and sleeping in the crib no problem!

How to Get Your Toddler to Eat
Step 1: Turn on Calming Music

Step 2: Let him eat what you are eating

Step 3: Let him take control and feed himself

Step 4: When that doesn't work, sing "If You Are Happy and You Know It" over and over and over

Step 5: Shove food into his mouth when he giggles at the song. Do this until he is finished eating.
Step 6: Go insane! Your child will find this funny and then will eat on his own. You're welcome!

How to Shop for a Toddler's Birthday Without Buying Toys
Do you feel like ever since you had a kid toys are taking up your entire house?
f that is the case, I have 10 non toys items that you can gift a toddler that will be just as meaningful and fun, if not MORE, than a toy could ever serve.
Some of the links in this post are affiliate links. This means if you click on the link and purchase the item, I will receive an affiliate commission at no extra cost to you. All opinions remain my own.
1. Book Club Membership
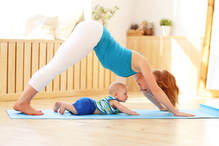
2. Baby and Mommy/Daddy Yoga Class
3. Children's Museum Pass

4. Toddler Art Class or Art Kit


5. Baby's First Year Memory Keepsake

Wild Dill sells these cute first year books! Click to shop.
6. Swim Lessons

7. Baseball Tickets

8. Zoo Membership

9. Train Ride

10. Kids Cooking Class
How to Prepare for Breastfeeding
Some of the links in this post are affiliate links. This means if you click on the link and purchase the item, I will receive an affiliate commission at no extra cost to you. All opinions remain my own.
Step 1 Order a pump through your insurance
I ordered mine with Medela. Fill out a questionnaire and see if you are eligible.
Step 2 Clean and sanitize your pump parts
Follow the directions that come with the pump. I boiled and then washed the parts the first time before using. Subsequently, I only washed.
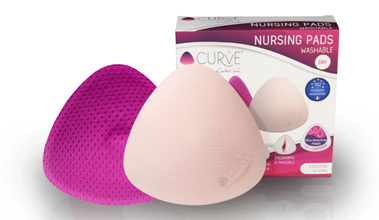
Step 3 Buy supplies

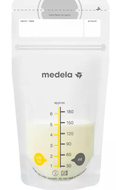

Click to shop
Click to shop
Click to shop
Click to
 set custom HTML set custom HTML
Click to shop Project Nursery

Step 4 Take a class
Sign up for classes at your local hospital and research La Leche League near you to join support groups and classes for after Baby is born.
Step 5 Practice relaxing techniques
It's important to practice relaxing techniques now, so when your baby comes you can learn to relax your mind and body for your let down to happen.

Step 6 Get excited for baby!

|
Categories
All
|


 RSS Feed