|
Are you looking for Easter basket ideas other than stuffing it full of candy?
Alternatives to Easter baskets are not always easy to find. The aisles are often covered in Easter candy and plastic eggs. Or you find elaborate Easter basket ideas all over Pinterest which look as if you need a home economics, marketing, and photography degree to pull off how nice these baskets look. And while I’m not against candy and pretty pictures that look good on Instagram (seriously, no hate, I’m impressed with moms who this is their thing), I’m a Lazy Mom who will probably wait until the last minute to throw something together. I want easy ideas. Since I’m a teacher who always wants to promote literacy for preschoolers, I’m probably going to add a book (along with some candy). Then, I thought why don’t I add an easy literacy activity to go into the Easter basket to promote preschool literacy even more. So viola, I have 5 easy Easter basket ideas for lazy moms to promote preschool literacy. Lauren Barrett Writes is a participant in the Amazon Services LLC Associates Program, an affiliate advertising program. As an Amazon Associate, I earn from qualifying purchases. Read more about these links in my disclosure policy.
5 Easy Easter Basket Ideas for Lazy Moms to Promote Preschool Literacy
#1 Pete the Cat Easter Basket
Pete the Cat is a fan favorite in our household. We love his vibe.
“It’s all good.” Pete the Cat wouldn’t care about intricate, picture-perfect Easter baskets. He would like simple, feel-good Easter basket ideas and probably one of his books to go with it. So what can you add besides candy?
What can you do to promote literacy with your preschool child?
Will you preschooler cry over your lazy mom attempt to fill an Easter basket? Goodness no. They will just keep on playing.
#2 Little Blue Truck Easter Basket
Beep, Beep, Beep. Easter’s here. What can you fill your kid’s basket with that will bring them cheer?
Little Blue Truck, course. Another favorite in our house. What are some easy alternatives to fill your preschooler’s Easter basket? What can you do to promote literacy with your preschool child?
Now you are in luck. Your kid will love his basket with Little Blue Truck.
#3 Henry’s Hiccups Easter Basket
Give your child the gift of communication this Easter season by doing a Henry’s Hiccups Easter basket.
Henry loves school until he encounters a problem. He can’t get rid of his hiccups. He tries a number of ways to get rid of them, but no matter what he does, his hiccups keep getting in the way of correctly answering the teacher’s questions. That is until he discovers a new way of answering questions without speaking – sign language. What are some of the best ideas for an Easter basket to promote literacy?
What can you do to promote literacy with your preschool child?
Your little preschooler’s communication will be blooming in no time with this Easter basket idea.
#4 Pout, Pout Fish Easter Basket
Deep in your basket
Where candy hangs out Will now be a fantastic, funny treat Your kids can read all about. Spice up your preschooler’s Easter basket with this easy idea. The Pout, Pout Fish. Kids love his gloominess and rhyming ways. And the book makes a great way to promote literacy. What are some of the easiest ideas for an Easter basket to promote literacy? What can you do to promote literacy with your preschool child?
Your little one will be doing anything but pouting after she gets this Easter basket.
#5 Piggie and Gerald Easter Basket
Piggie! Gerald!
What better idea for an easy Easter basket than no other than a Piggie and Gerald themed book. Their books are so simple, yet they are so rich in literacy. That’s why they are beloved by all preschoolers. What are some of the ways to fill this Easter basket to promote literacy? What can you do to promote literacy with your preschool child?
Don’t forget the Pigeon with this basket!
That’s a wrap.
With these fun and easy Easter basket ideas, your preschoolers will have a blast reading and exploring new ways to engage with books. You, my lazy mom, will sit back and enjoy the fact that you didn’t spend hours and money crafting the perfect basket only for it to be destroyed in less than 5 seconds on Easter morning. And your little one’s teeth and your wallet will take you later at the next trip to the dentist!
0 Comments
Do you hate thinking about your death or leaving your family behind? You are not alone. I know it’s a morbid thought. You just had a new baby. You are a new parent, and life seems to have begun all over for you again. Death is far from your mind. But then you’re told to prepare for your death just in case you die young. You read things that tell you to take critical steps before you die. Why?? I saw this quote once…. “Preparing for death is one of the most empowering things you can do. Thinking about death clarifies life.” -Candy Chang And it is so true, especially as a new parent. My husband and I were forced to think about death and take action to prepare for an untimely death right after we became new parents. I had a brain aneurysm and was undergoing surgery. Although the odds of my surviving the surgery were super high, we wanted to have a plan in place just in case. Because once you have a new baby and become a parent, you learn that your life is much more than being all about you. It’s about your children and what legacy you want to leave behind. Taking action as a new parent to prepare for your death will make it much easier for the family you leave behind. In their grief, they will seek comfort in knowing the great lengths you went to in order to make sure they are safe, secure, and loved even in your death. It’s all about making sure your family is okay without you. That’s why I have six critical steps you can do today before you die to leave an everlasting legacy to your kids. Lauren Barrett Writes is a participant in the Amazon Services LLC Associates Program, an affiliate advertising program. As an Amazon Associate, I earn from qualifying purchases. Read more about these links in my disclosure policy. 6 Critical Steps New Parents Can Take Before They Die STEP #1: GET LIFE INSURANCE If you didn’t already have life insurance before kids, now is an imperative time to get life insurance. Why parents should have life insurance before they die is an important question to ask. Sure, most of us imagine living a full life and amassing plenty of money to leave behind to our kids and husbands once we pass away. But, what about, God forbid, you die young and unexpectedly? In the absence of life insurance, the burden of bills, mortgages, education, and other day-to-day expenses now lies on the shoulders of a spouse or other family member. But with life insurance, the deceased parent’s life insurance policy will provide money to a beneficiary to help cover important financial costs for your kids. As a working mom providing an income to help support my family, my death would mean my family would stop getting a paycheck. Getting life insurance is a critical step I, as a new parent, can take before I die to make sure my family is set up for life…just in case. Think life insurance is only for working moms and dads? Think again. Stay-at-home moms and dads without a steady income are also providing crucial care and need to be covered in the event of an early death. If a stay-at-home mom (or dad) dies prematurely while her kids are still young, childcare and help around the will now need to be provided which costs money. Thus, having life insurance will help offset that cost. Look into life insurance today especially if you are a new parent. STEP #2: HAVE A WILL If you are like me, you picture writing a will when you are old and ready to pass away like you see in all the TV shows and movies. But right before I was about to have my brain aneurysm surgery, we decided to get a will. Why? A will not only designates who gets your money and assets once you die, but it also notes who will watch over your kids if both parents die and who your medical power of attorney is. In my case, that was important. What if something went wrong with my surgery? I needed someone to make decisions for me in case I was incapable of doing so. As a new parent, get a will right away. It is such an important step to take before you die. Without one, in the event of your death, the courts will handle who will watch over your children and what to do with your money. And that could get messy. You don’t want that. Right now, my parents, since they are younger, will be guardians of our child with my husband’s parents as second in line. An important thing to note, is to update your will frequently as people age, money and assets amass, and circumstances change. STEP #3: PLAN YOUR FUNERAL AND LEAVE INSTRUCTIONS This was hard for me to swallow. Plan my funeral as a young mom? What? But it is yet another critical step to take before I die. Why? Death, especially a tragic, unexpectant, or young death, leaves the family members left people full of grief, sorrow, and often unable to think clearly - let alone plan a detailed funeral to honor their loved ones . Leaving instructions behind will help ease this burden. So what I did was make a folder in my Google Drive that I shared with my husband. My goal for this year was to update this folder monthly with all kinds of death preparation. In this folder, I started documenting what type of funeral I want. I’m Catholic, so I left the name and number of the church where I would like my mass to take place. I listed my favorite readings, hymns, and songs that I would like to be read and sung at my funeral. I listed people who I would like to read or speak at my funeral. I listed directives and questions to ask for planning a Catholic funeral. I plan to leave a list of my favorite charities where I would love people to contribute in the event of my death. I’ll even go as far to probably outline an obituary that I’ll update ever so often. *I mainly did this because I love to write, and my husband won’t do my obituary justice 😂 (I swear I’m not a narcissist)* I am doing this all to leave my parents, spouse, and child unencumbered with the difficult, minute details that go into death. It’s something you can start today and contribute to a little each month. STEP #4: KEEP A LIST OF ASSETS AND DEBTS In a safe or a Google Drive folder have a list of all your debts and assets before you die. Your debts can include
Your assets can include
In your file, leave a list of instructions on who should handle your debts and assets (these can also be included in your will) and who will inherit these things (especially your assets). For example, I have a lot of journals, notebooks filled with writing, scrapbooks, and boxes of pictures that I don’t want to be thrown away. In my preparation for death, I would designate who would receive these assets. As a writer, I perhaps would want some of my unpublished work to later be published posthumously; therefore, I would need to document in writing what these pieces are and who should handle them in the event of my death. Another thing to note is to keep a list of all the bills and how to handle them. My husband’s Fair Play card is the Money Manager. He handles all of our bills and payments, thank the Lord. Money is definitely his strong suit, not mine. If he were to die, I would be overwhelmed trying to figure that all out. Thankfully, he has prepared for his death by keeping a list of all of this important information for me. On the other hand, I handle more of the personal stuff like birthdays, holidays, and school. I can leave a list of important birthdays - whom to send a card or gift to - or whom to buy holiday gifts for. STEP #5: WRITE PERSONAL LETTERS On the surface, writing personal letters before you die might not seem so critical, but, I dare to say, it is. As a writer and someone who loves to receive and give handwritten notes, I couldn’t imagine dying now and my son growing up without some type of sentiment I leave behind for him. That’s why I plan to write him a letter every five years, and if I happen to live until a ripe old age, he now has a letter from me at every age and stage of his life, which I imagine will be very special to him one day. Because I am extra, I also plan to write letters to my husband, parents, friends, and other important family and people in my life. In the event of my death, I will have someone distribute or share these letters. Though, perhaps, I won’t update those every five years. That kind of seems like a lot of work. Not one for writing? You can leave video messages behind, which would be just as special. STEP #6: KEEP A LIST OF LOGIN INFORMATION AND CONTACTS Lastly, and this is important, before you die keep a list of all login information and important contacts in a safe place in which someone can access in the event of your death. I left behind my login information for all of my emails and social media accounts. If you handle the finances, keep a list of logins for all banks and financial apps. You can keep a list of contact information for people who handle your mortgage, insurance, taxes, car maintenance, finances, will, house repairs, etc. Death of a loved one is a stressful, sorrowful time, and the last thing I want is for a loved one frantically rummaging around trying to find all of this information during an already overwhelming period for them. Death is scary to think about, but what is even scarier to think about is being unprepared for your death. To make it easier for me, I picked one of these things to build a folder for each month. Once I have made the foundation, I will continue to update it and add to it as I age and learn more. New parents’ taking these steps before they die is a loving gift they can give to their children. Preparing for death doesn’t have to be so scary and daunting if you follow this guide. Join the conversation below and contribute some of the ways you have already prepared for your own death. And share this post with any new parent you know. We can all be prepared together.
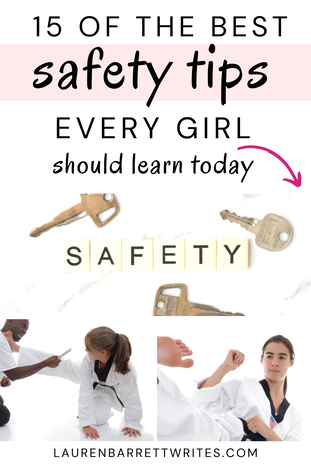
The statistics are not great. 1 in 5 women experience completed or attempted rape. 81% of women and 43% of men experience some form of sexual harassment in their lifetime. And that is what is reported. With that information, self-defense should be a required teaching component in all high schools throughout America, but sadly it is not. While I am not an expert and neither am I trained in self-defense, I gathered some of the best self-defense/safety tips that I have learned over the years and researched myself and brought them to a group of students in my freshmen Homeroom class. They were captivated and engaged throughout the whole 30 minute lesson. Phones barely came out. While I am aware that every school can’t hire a licensed professional to teach a course on self-defense (though they should), these 15 tips can be life-saving, and teenagers, especially young girls need to learn these personal safety tips today. Rideshare Safety 1. Always ask the driver who he/she is here for. Before you even enter a rideshare, such as an Uber or Lyft, always ask the driver who he/she is here for instead of asking, “Are you here for (your name)?” Why? To minimize the chance of getting in the wrong car, especially at busy areas where a lot of rideshares are driving around picking up people, you want the driver to have to look at his phone to double check who he/she is here for. If you just say, “Are you here for (your name)?” the driver can merely say, “yes,” without confirming. Unfortunately, there have been reported incidents of fake Uber or Lyft drivers preying on innocent people. These drivers pose as a rideshare service but are only doing it to scam you of money or worse. That is why you always need to (1) confirm the make and model of the car from the app with the car that shows up in person, (2) Ask them who they are picking up, and (3) Ask them for their name. 2. Screenshot the driver’s information and share with a loved one. Before or once the driver has picked you up, share the details of your trip with someone you love right away. Send them the make and model of the car, the name of your driver, where they picked you up, where you are going, and how long the ride should last. Once you have safely reached your destination, reach out to your loved one to confirm that you arrived. At the start of the trip, you should have established with your loved one that if you don’t text to confirm you have made it within x number of minutes, your loved one should attempt to get in touch with you. If they cannot, instruct them to call the police. This tip is especially important if you are riding alone. 3. Use your home address with caution. Should you use your home address or not when getting in a rideshare? I’ve seen this debated on online forums before. While I always use my home address now, I also live with my husband with a home security system. After high school, these teenagers might live alone or in an all-female house. To protect the safety of its customers, Uber makes it easy to enter a street nearby without having to enter your exact home address. I advised my students to follow this safety procedure especially if they live alone or with only females. 4. Sit in the back seat. Uber lists this as a safety tip on their website, and I agree. Not only does it give you some personal space from the driver, but you can also choose which way to exit if having to be dropped off on a busy street. Even still, if faced with a dangerous situation, such as an erratic or threatening driver, they have less access to grabbing you or stopping you from escaping if you sit in the backseat. With more and more people using rideshares, especially teenagers who cannot drive yet, these safety tips for rideshare need to be taught at an early age. Everyday Routines 5. Shift Your Awareness. Survivor and founder of a program called Kids S.A.F.E, a self-defense class, Robyn Warner shares that there are different levels of awareness. Most of the time we spend our life in neutral, but Robyn says there are times when we need to upshift our awareness, especially for women, in situations that leave us more vulnerable: at the ATM, pumping gas at night, taking the garbage out at dusk, and going on runs. She then advises us to go back to neutral, so we don’t live our lives paranoid. That means we need to rethink our everyday routines and change some things about them in order for us to be prepared and safe. I cautioned my students to not do the same thing at the same time every day, especially if they were doing that thing alone. That could look like not always running on the same trail at the same time every day to avoid potential stalkers knowing your routine. It’s also important to share your location if you plan on running alone and how long you expect to be gone. 6. Carry an emergency kit. When going out, have an emergency kit readily available to tuck into your purse or pocket. That includes all or one of the following: mace, pepper spray, pocket knife, flashlight, or rape whistle. That way if you are ever attacked, you are prepared. Practice carrying these things around and taking them wherever you go. Get into the habit of remembering these things. Do not just brush it off if you forget them. “Oh, I won’t need it.” No, go back and get it until it becomes second nature. 7. Ask for an escort. If you feel unsafe walking back to your car from the mall or back to your apartment from a party, don’t feel embarrassed to ask for an escort. The escort could be as simple as insisting a friend walk back with you or asking security to walk you out. And if you are in a situation where neither of those options are available, call the cops or 911. Trust your instincts. It’s always better to be safe, not sorry. 8. Lock the doors as soon as you get in the car. Oftentimes when we get into the car, we get distracted by looking at our phone, pulling up GPS or finding a podcast that our level of awareness goes way down. I cautioned my students to get into their cars and immediately lock the doors before doing anything else. That way if they need to be idle before pulling away, someone can’t easily enter their car without casting suspicion first. I warned that this is especially important when they are traveling alone, it’s nighttime, and they are in a deserted area. 9. Check under the car and in the backseat. I told my students to check under the car and the backseat at night. That’s why it would be beneficial to carry a flashlight in order to do a quick scan to make sure no one is there or anything is remiss (i.e. flat tire). 10. Use caution with suspicious people. When you are alone, especially when it’s dark outside, be wary of suspicious people hanging around your car or your path home. This is when Robyn says to really upshift your awareness and be on high alert. She says this is the time when you do not want to present yourself as an easy opportunity, meaning don’t be looking down at your phone or slumping your shoulders. Walk with your shoulders back and look people in the eyes. It also helps to talk directly to the suspicious person “You are making me uncomfortable,” or about the suspicious person on the phone, “There’s this guy hanging out by my car. He has on blue jeans and a white shirt. He’s about 6’2 with brown hair and a beard.” I also told my students about a time I took a self-defense course, and the instructor told us to act crazy. She said to talk to yourself in different voices and mumble nonsense. I told my students to practice this, so if/when the moment arises, they are prepared. The instructor told us that an attacker wants a vulnerable, easy victim, not an erratic, unstable person. In an attack 11. Yell out information. While teaching her courses, Robyn always asks her participants what they would do in the event of an attack. She says all of them usually say that they would scream or make some noise. While Robyn says that is good, she preaches that we need to yell out actual information. “Lauren Barrett, and I am getting attacked by a man. He is trying to assault me. Walnut Creek Greenway.” Repeat over and over. People scream. Kids can scream when they play. A parent can scream at her children. So the likelihood of a scream going ignored is higher than if we yell out information of what is happening to us. Robyn says that this isn’t always easy in the moment, so we need to start practicing, especially at an early age. 12. Try to get your phone to dial 911. In addition to yelling, call out to your phone to dial 911 (“Hey Siri, dial 911.”). And yell the same information about the location of your attack, what your attacker looks like, and what is happening over and over in the hopes that 911 picks it up. When Robyn was attacked, she had dialed 911 right before her attacker got to her because she was already highly suspicious of the man. And that is likely one of the reasons she survived. 13. Stay at the scene. When being attacked, it’s best to try to stay at the scene of the attack or as near as possible. You don’t want your attacker to take you someplace else, especially since you yelled out your location over and over. Someone could have heard you and is sending help or you were able to dial 911. 14. Scream in the attacker's face and talk to the attacker. Another thing that I learned in the self-defense class I took is that when your attacker grabs you, instead of trying to turn and pull away, which only strengthens his grip on you, you want to lean in, do a self-defense move, and scream in his face (think Mufasa’s roar in the Lion King instead of a little kid’s terrified shriek). Then, Robyn says to talk to your attacker. “What’s your name?” “Where do you live?” “Why are you doing this?” Robyn says this makes you feel more human in your attacker’s eyes. She said that when she did this with her attacker, he would stop and pause, and in that time, she was able to take a breather and readjust her clothes. 15. Learn self-defense moves. I recommended to the students in my class to take a self-defense class to learn the proper moves for escaping or fighting back against an attacker. I really think all teenagers should learn in high school if not earlier and continue to refresh their skills every few years. In her class, Robyn teaches to go for the breeder or the breather. That is the face (eyes, nose, mouth, esophagus) and the groin. People can work out their arm and leg areas to make them stronger and no match for you, but everyone’s eyes, nose, mouth, esophagus, and groin are on the same playing field. She warns that you have to fight back and those are the critical areas to target to incapacitate your perpetrator. The bell rang for the day of our session, and I could tell my students wanted to learn more. Some even questioned why this wasn’t taught in health/PE. Even if it isn’t officially a required course, these 15 tips can be reviewed by parents and teachers in the hopes of preventing an attack or saving a life one day. As Robyn’s motto goes, “prepared not scared,” we want our young adults to grow up with the knowledge that they are capable of fighting back against the evil of this world and the independence to take care of themselves. You can follow her on Instagram @aflyonmywall for more weekly advice on all things self-defense and safety.
I have written a post about why parents should try to greenlight desired behaviors in their kids.
That is the best way. Hands down. Greenlighting will promote positive relationships between your child and you. You won’t yell as much. Your child will have more confidence. And you will have an overall happier home. However, bad behaviors in your toddlers will arise from time to time. First, I want to say that that’s natural and not a reflection of what kind of parent you are. These bad behaviors might look like excessive whining, throwing, kicking, hitting, or breaking a coveted family rule. Dr. Harvey Karp calls these unwanted behaviors yellow and red light behaviors. And while we wanted to handle bad behavior generously and without hitting in order to avoid excessive yelling and power struggles, there is a time and place where we need to break out consequences and not allow the tantrum to ride its course (Think - hitting, biting, kicking, throwing). That time and place is usually yellow and red light behavior. Lauren Barrett Writes is a participant in the Amazon Services LLC Associates Program, an affiliate advertising program. As an Amazon Associate, I earn from qualifying purchases. Read more about these links in my disclosure policy.
10 Proven Ways to Discipline Your Toddler's Bad Behavior Without Spanking
In today’s blog post, I have 10 proven ways for parents to discipline their toddlers in an efficient way and by breaking generational cycles of spanking.
What Are Yellow Light Behaviors?
Yellow light behaviors are those unwanted behaviors our kids display that aren’t dangerous or putting anyone in harm’s way but, for lack of a better word, are annoying. They pop up during unwelcomed times like during a trip to the store, the middle of church, a work call, or a conversation with another adult. They happen when you are tired or stressed. They are annoying and require some type of response. Yellow light behaviors can include
How to Respond to Yellow Light Behaviors?
#1 Use Toddler-Ese Toddler-ese is the language of your toddlers. It’s short, repetitive phrases with a little bit of mirroring to match your toddler’s emotions. Dr. Karp says, “You will be able to prevent up to 90% of tantrums before they even happen and you’ll settle more than 50% of the meltdowns that do occur…in seconds!” Dr. Karp has a great blog on how to use toddler-ese. As parents, when we get angry, we tend to use long, complicated sentences in a deep, authoritative voice. But to your toddler, that is like speaking a foreign language which causes them to get even more upset because they don’t understand you. But when you use toddler-ese to curb unwanted behaviors, you are connecting with respect, validating the feelings, and speaking in a way that your toddlers will know you want them to stop. #2 Offer a win-win compromise The goal of curbing the undesired yellow light behavior is to leave the situation with love and respect. No yelling or power struggles. When your child is whining, pouting, and trying to negotiate, use the win-win compromise approach. The idea of it is to give your child a win that you don’t mind compromising on. For example, your son is pouting about eating the food in front of him. He wants something else.
Usually this will work, but if it doesn’t, allow your son to leave the table but without the wanted food. Still a win-win. Let me offer another example. You are trying to get work done, but your daughter is begging you to play with her. Try this….
If you have no time to play at all, over a win-win by penciling in or scheduling in a timer when you can play on your phone or calendar. Color code it green, so she knows that she has the go-ahead to play with you. Using a win-win compromise is a proven response to work when dealing with unwanted behaviors. #3 Clap-growl Sometimes, your kid’s unwanted behavior needs to be stopped immediately. For example, you’re having an important conversation with an adult, but your kid is pulling on your pants whining. Enter in the clap-growl. Another Dr. Karp technique. To get their immediate attention, clap loudly two-three times while growling and saying “Stop. Now.” I like to add in the sign language for Knock It Off. In times of frustration and distress, kids respond better to nonverbal cues rather than words. Therefore, the clap-growl works. #4 Kindly ignore Sometimes, your kid’s incessant annoying behavior needs to be kindly ignored. *Don’t use this if your child is scared, very sad, or hurt.* When you use kindly ignoring, first acknowledge your kid’s feelings and broadcast back his emotions. If the fussing or whining continues, reassure that you love your child, but you are busy and will be right back. Walk away and preoccupy yourself while kindly ignoring your child. If the whining stops, return, echo his feelings, and provide some sort of positive feedback like a hug or praise or time-in. If the whining persists, return and repeat the first steps. Then, walk away for a longer time period. If it still persists, you have now entered a red-light misbehavior which you’ll learn about later on in this blog. #5 Whisper A mistake that parents often make is that they think they need to be louder than their child to calm loud behavior, but the opposite actually works. When we whisper, your child starts to pay attention and think that what you are about to say is very important. They are more likely to listen. When my son is engaging in yellow-light behavior, I get down on his level and call him over in a whisper voice. I then proceed to dramatically and calmly whisper. “Hey, guess what. I have something to tell you. You are mad, mad, mad. You want to play outside. But I have to get dinner ready first. Do you think you can play inside with your toys while I do this? I think you can. That’s why I’m whispering because I think you are the only one who can.” Whispering works well to curb yellow-light behavior.
What Are Red Light Behaviors?
Red light behaviors go beyond those annoying behaviors that drive us crazy. And while I believe that there are no bad kids - being a toddler is tough - red light behaviors are bad and need to be stopped immediately! Red light behaviors can include
How to Respond to Red Light Behaviors?
# 6 Time out Time-outs can get a bad rep, but we are probably imagining the punitive way of time-outs of the past. I.e. Locking our kids in their rooms for long periods of time or making them sit in the corner with their noses to the wall. But when done right, in the positive parenting sense, they can be quite effective according to research. Steps to giving a time-out:
#7 Give a fine What happens when you speed repeatedly? You get a fine from the police. The same thing can happen to your toddler when he repeatedly does a bad behavior that you told them to stop. He’ll get a fine. But in the toddler sense, instead of asking them to pay money, we are going to take away something they like. I use giving a fine when my toddler throws or hits. I’ll take away the toy he threw and essentially put it in time-out until he has settled down and is ready to play nicely again. Dr. Aliza of Raising Good Humans does caution in her podcast to NOT take away something that isn’t connected to the throwing. For example, if your toddler threw his toy car, don’t take away his favorite stuffed animal. A key takeaway to remember is that the fine should connect the punishment to the bad behavior. If your toddler hits you, remove yourself from playing with him for a bit. That’s a fine. If your toddler throws a toy, remove that toy. That’s a fine. If your toddler sneaks TV time without your permission, take away TV time. That’s a fine. Once the toy or object is removed, validate to your toddler their feelings. “I know, You want the toy. You want it bad. Bad. Bad. But I said No, No, No throwing. And you didn’t listen. So bye-bye toy.” When your toddler starts to listen, praise him for listening and reinforce with greenlight strategies. #8 Get down on their level When we discipline our toddler’s bad behavior, it’s easy to want to hover them and present ourselves as big and scary. And to our toddler that is exactly what they say - big and scary Mommy and Daddy. But that further dysregulates their already emotional brain. So a proven way to discipline their red light behavior is to get down on their level and gently tell them that they need to stop right now. If the bad behavior consists, move on to a time-out or give a fine. #9 Speak in a deep voice Dealing with a red light behavior that needs to stop now? Maybe you already gave a warning to your daughter for her to stop throwing her toys? But she isn’t listening. Use a deep voice to get the bad behavior to end immediately. Then, get down on your toddler’s level to explain why they can’t throw, validate their feelings, and use toddler-ese. The unwanted behavior still persisting? Move on to a time-out or give a fine. #10 Guide their hands When our toddlers are having trouble with hitting, throwing, and other acts of aggression sometimes they need help with what to do with their hands instead of those violent actions. In one of my favorite ways to calm a tantrum, I like to guide my son’s hands with magic breaths. In child psychologists Cara Goodwin’s book, What To Do When You Feel Like Hitting, she goes over strategies on ways toddlers can use their hands in a more productive way when they feel like hitting. She suggests hugging yourself, squeezing your fists into balls, using sign language to express feelings, or maybe pounding a ball of playdoh. Sometimes guiding your toddlers hands is all it takes to help them release anger in positive ways.
Wrapping Up
With these proven ways to discipline your toddler’s bad behavior there is no need to ever spank your child. These 10 ways will help you discipline your kids in a positive way that builds mindful relationships and fosters love between parents and children. Check out my parenting guide, Now What?, on different strategies to do during life’s hard moments with your kids. Interested in my parenting checklists for life’s hard moments? Snag yours below.
|
Categories
All
|
Proudly powered by Weebly











 RSS Feed